5 Recycle Bin Settings on Windows 11 Every Users Should Know
If you have used the Windows operating system, you probably know about the Recycle Bin. The Recycle Bin on the Windows operating system basically stores all the files you delete from your computer. It acts as an added recovery program that helps you recover files that were accidentally deleted.
Recycle bin also uses some storage space to store the files you have deleted, and when its storage exceeds, it deletes the oldest files to make space for the new ones. Recycle bin is available on every Windows version, including the latest Windows 11, and Microsoft has no plan to modify or replace it with anything else.
Normally, we don’t think about making any changes to the Recycle Bin, and we leave it as it is. However, there are a few things that you can do with Recycle Bin to improve your Windows 11 system. For example, if you are running a sort of storage space, you may want to decrease the Recycle Bin storage, you may wish to empty recycle bin on a schedule, and more.
List of 5 Best Recycle Bin Settings on Windows 11
Hence, this article will list down the 5 best Recycle bin features that every Windows 11 should know and use. The methods shared below were safe to follow. Let’s get started.
1) Delete Files Permanently
If you want, you can set Recycle bin to delete files permanently in easy steps. So, if you don’t want Windows 11 to send your deleted files to the recycle bin, you need to make a few changes to the Recycle Bin settings. Here’s what you need to do.
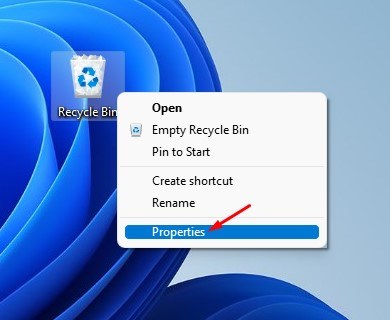
1. First of all, right-click on the Recycle icon on the desktop and select Properties.
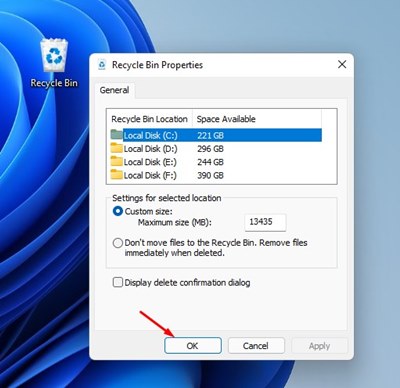
2. On the Recycle Bin Properties, select the second option that reads Don’t move files to the Recycle Bin.
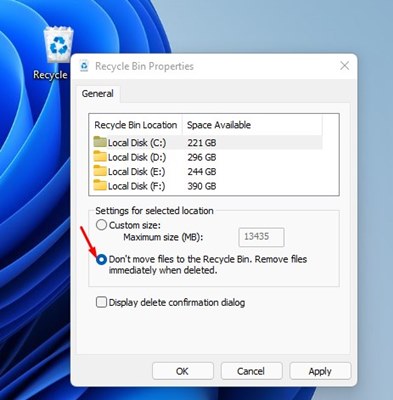
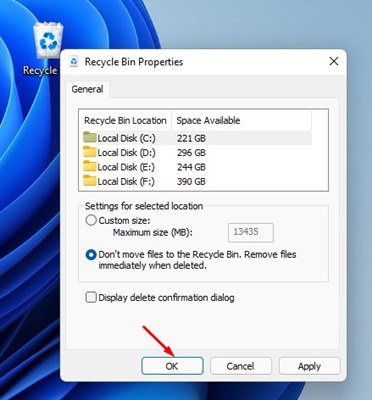
3. Once done, click on the Ok button to exit the Recycle Bin Properties.
That’s it! You are done. This is how you can delete files permanently on Windows 11 without sending them to the Recycle Bin.
2) Increase or Decrease the Recycle Bin Storage
As we all know, Recycle Bin takes some storage space from your drive to save the deleted files. If you are someone who frequently clears the Recycle Bin, it’s best to decrease the Recycle Bin Storage. Doing so will free up some hard disk space. On the other hand, if you feel like having more storage in the Recycle bin, you can increase it too. Here’s what you need to do.
1. First of all, right-click on the Recycle icon on the desktop and select Properties.
2. On the Recycle Bin Properties, select the Custom Size option and define a specific size in MB.
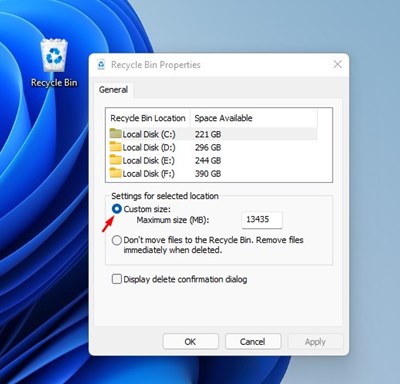
3. Once done, click on the Ok button to save the changes.
That’s it! You are done. This is how you can increase or decrease the Recycle Bin Storage in Windows 11.
3) Enable the Delete Confirmation Prompt
Well, via Recycle Bin, you can even enable a delete confirmation prompt. This feature is especially useful for those who tend to accidentally delete files very often. With this feature turned on, you will see a prompt asking you to confirm whether you want to delete the file. Here’s how to enable the delete confirmation prompt in Windows 11.
1. First of all, right-click on the Recycle icon on the desktop and select Properties.
2. On the Recycle Bin Properties, enable the option Display delete confirmation dialog
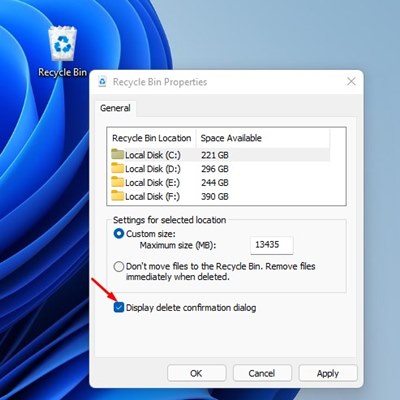
3. Once done, click on the Ok button.

That’s it! You are done. This will display the delete confirmation dialog every time you try to delete a file.
4) Put Recycle Bin icon in the System Tray
If you are someone who frequently opens the Recycle Bin folder, you may want to move the shortcut to the system tray. If you move the Recycle Bin to the System tray, you don’t need to move to the desktop screen to access the Recycle Bin.
On techviral, we have already shared a detailed guide on how to add Recycle Bin to the System tray. Simply open the link and go through the guide to put Recycle Bin icon in the System tray on Windows 11.
5) Empty Recycle Bin on a Schedule
Windows 11 has a storage management feature known as Storage Sense. Basically, the feature is designed to free up storage space on your computer. You can configure the Storage sense on Windows 11 to empty recycle bin on a schedule. Here’s what you need to do.
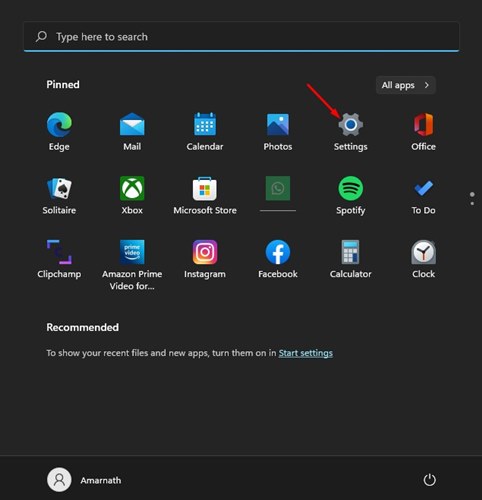
1. First of all, press the Windows Key + I button to open the Settings. Alternatively, click on the Start button and select Settings.
2. On the Settings app, navigate to the System > Storage > Storage Sense.
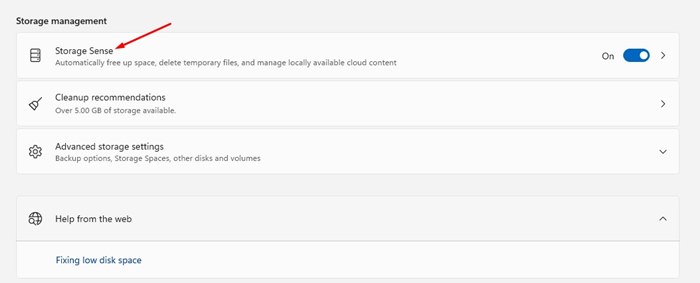
3. Enable Storage sense and look for an option ‘Delete files in my recycle bin if they have been there for over’. Now, select the number of days you want to set.
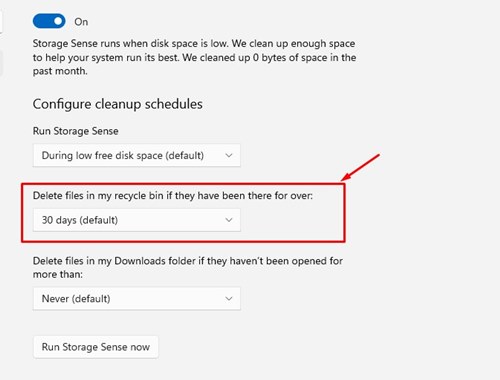
That’s it! You are done. This is how you can configure Storage sense to empty the Recycle Bin on a schedule.
So, these are the five best Power user recycle bin settings you can configure on Windows 11. I hope this article helped you! Please share it with your friends also. If you have any doubts related to this, let us know in the comment box below.
The post 5 Recycle Bin Settings on Windows 11 Every Users Should Know appeared first on TechViral.
ethical hacking,hacking,bangla ethical hacking,bangla hacking tutorial,bangla tutorial,bangla hacking book,ethical hacking bangla,bangla,hacking apps,ethical hacking bangla tutorial,bangla hacking,bangla hacking pdf,bangla hacking video,bangla android hacking,bangla hacking tutorials,bangla fb hacking tutorial,bangla hacking book download,learn ethical hacking,hacking ebook,hacking tools,bangla ethical hacking course, tricks,hacking,ludo king tricks,whatsapp hacking trick 2019 tricks,wifi hacking tricks,hacking tricks: secret google tricks,simple hacking tricks,whatsapp hacking tricks,tips and tricks,wifi tricks,tech tricks,redmi tricks,hacking trick paytm cash,hacking trick helo app,hacking trick of helo app,paytm cash hacking trick,wifi password hacking,paytm cash hacking trick malayalam,hacker tricks, tips and tricks,pubg mobile tips and tricks,tricks,tips,tips and tricks for pubg mobile,100 tips and tricks,pubg tips and tricks,excel tips and tricks,google tips and tricks,kitchen tips and tricks,season 2 tips and tricks,android tips and tricks,fortnite tips and tricks,godnixon tips and tricks,free fire tips and tricks,advanced tips and tricks,whatsapp tips and tricks, facebook tricks,facebook,facebook hidden tricks,facebook tips and tricks,facebook latest tricks,facebook tips,facebook new tricks,facebook messenger tricks,facebook android app tricks,fb tricks,facebook app tricks,facebook tricks and tips,facebook tricks in hindi,tricks,facebook tutorial,new facebook tricks,cool facebook tricks,facebook tricks 2016,facebook tricks 2017,facebook secret tricks,facebook new tricks 2020,blogger blogspot seo tips and tricks,blogger tricks,blogger,blogger seo tips,blogger seo tips and tricks,seo for blogger,blogger seo in hindi,blogger seo best tips for increasing visitors,blogging tips and tricks,blogger blog seo,blogger seo in urdu,adsense approval trick,blogging tips and tricks for beginners,blogging tricks,blogger tutorial,blogger tricks 2016,blogger tricks 2017 bangla,tricks,bangla tutorial,bangla magic,bangla motivational video,bangla tricks,bangla tips,all bangla tips,magic tricks,akash bangla tricks,top 10 bangla tricks,tips and tricks,all bangla trick,bangla computer tricks,computer bangla tricks,bangla magic card tricks,ms word bangla tips and tricks,bangla computer tips,trick,psychology tricks,youtube bangla,magic tricks bangla,si trick Credit techviral


