How To Fix ‘Unfortunately Settings Has Stopped’ Error On Android
If you are an Android user, you might have already experienced the following error: Unfortunately, settings has stopped.
This is one of the most irritating errors the Android operating system is plagued by. Here in this article, we will discuss everything about the error message and how you can fix it.
What is Unfortunately Settings Has Stopped Error?
The error can occur after installing a new firmware update. This is a common issue, but it created havoc when the KitKat update was released.
The error is not always related to the software update; sometimes, corrupted apps also trigger the error. However, since it’s a very common issue, a simple restart could fix the problem. However, if you frequently get the error message, there are a few other things that you need to do.
In most cases, restarting the smartphone can fix the error on your Android device. However, if you frequently get the error code even after the restart, here’s what you should do.
1. Restart Your Device
As we have already discussed above, in most cases, a simple restart can fix the ‘Unfortunately, Settings has stopped’ error on your Android smartphone. So, restart your device.
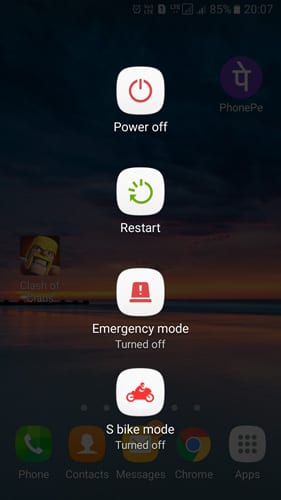
- Press and Hold your device’s Power Button
- It will show you a pop-up where you need to tap on Restart/Reboot
- Now, wait until your phone restarts.
After the restart, use the smartphone; you won’t get the error anymore. If you still get the error after the restart, follow the next methods.
2. Clear Your Phone’s RAM
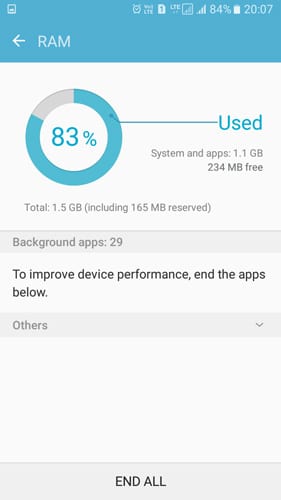
Lack of RAM also triggers the error on Android. Clearing a phone’s RAM is easy; you can do it without using any third-party app. Usually, smartphones come with a default RAM manager app, which helps to clear RAM in just one tap.
- First of all, locate the device’s built-in RAM Manager. On Samsung, the RAM manager is located in ‘Smart Manager’
- On the RAM Manager, you will see how much RAM your device is using right now.
- Now tap on ‘Clear RAM’ to free up some RAM.
Start using the smartphone as usual and see whether the error still appears.
3. Clear The Cache Of Settings
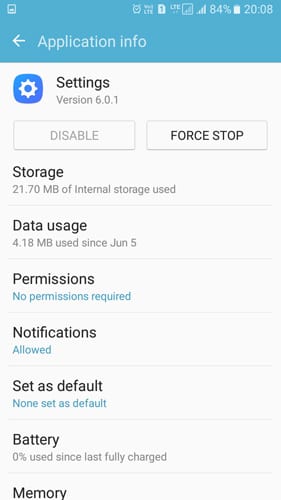
Corrupted cache files play a key role in every Android error. If your Settings app’s cache is corrupted, it may trigger unusual problems. So, you must follow these steps to check the Settings app cache.
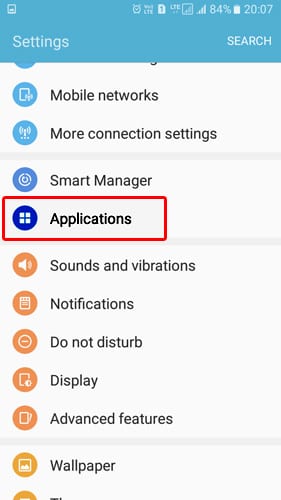
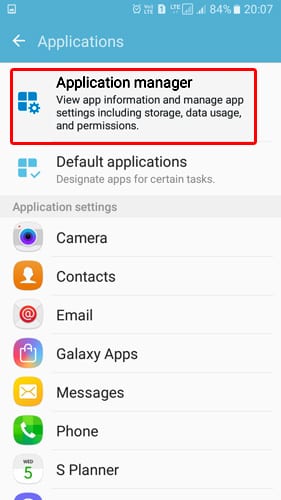
1. First, head to Settings > Apps or Application Manager.
2. You will now see the list of apps installed on your device.
3. Find the Settings app and then tap on it.
4. Now tap on the Force Stop. Then tap on Clear Cache and restart your Android device.
After the restart, use your Android smartphone normally to check whether the error persists. If the above method fails to fix the error, follow the next.
4. Clear Your Device’s Cache
We need to clear the cache of all applications installed on your device. After clearing the cache, the phone might behave unusually, but it will settle down within a few minutes of usage.
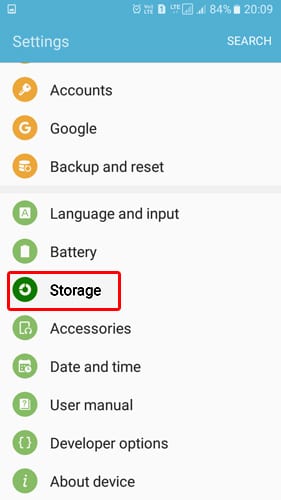
1. Head to the Settings on your Android
2. Now, under the Settings Panel, find the Storage option
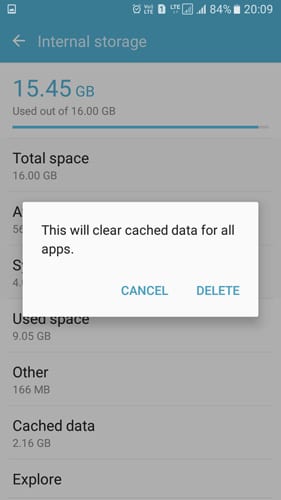
3. Under the Storage, you need to find and tap on the Cached Data option
4. You will now receive a ‘Clear Cached Data’ pop-up. Tap on Delete to clear the cache file.
This will clear all the cached data from your Android smartphone. Now restart your Android device and use it. You won’t get the Unfortunately Settings has stopped error anymore.
5. Uninstall the Recently Installed App
Sometimes, Android or app updates trigger the Unfortunately Settings has stopped error on Android. So, if you get the error after installing any third-party app, you need to uninstall that particular third-party app.
If there’s nothing wrong with the installed apps, you can try to boot into safe mode. Safe mode turns off all third-party apps installed on your Android smartphone. So, if the error occurred because of an app, you won’t get the Unfortunately Settings has stopped on the Safe mode.
If you get the error on the Safe Mode, then the apps have no problem. So, skip this method and follow the next one.
6. Factory Reset
If all of the above methods have failed to fix the error, the last option is to factory reset your Android device. Resetting data would remove all the installed apps and files from your Android device. So, create a proper data backup file before performing the Factory Reset.
Resetting your Android smartphone is easy; follow some simple steps below.
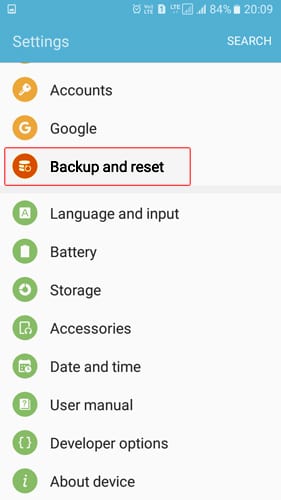
1. First of all, open Settings on your Android smartphone
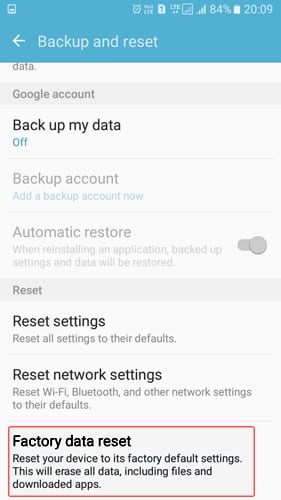
2. Now, under Settings, you need to find and tap on the Backup & Reset.
3. On the next screen, tap on the Factory Data Reset.
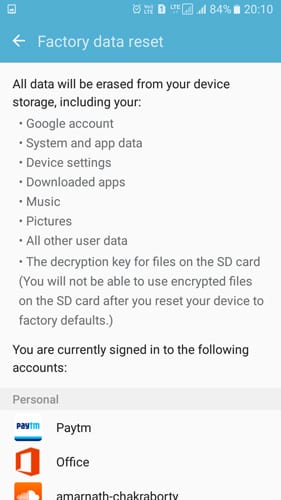
4. Finally, tap on the Reset Phone button.
This will erase all the files stored on your Android’s internal storage. After the reset, your device will work fine, and you won’t get the ‘Unfortunately Settings has stopped’ error anymore.
7. Clear the Google Play Store & Services Cache
Many users have claimed to resolve the ‘Unfortunately Settings has stopped’ error on Android by clearing the Google Play Store & Services cache. Hence, you can also try doing it to eliminate the error. Here’s what you need to do.
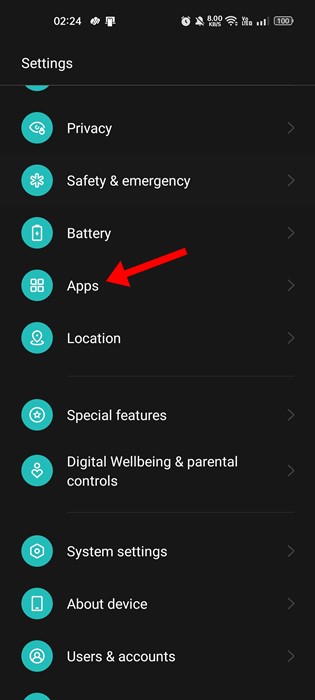
1. Open the Settings app on your Android, scroll down, and tap on the Apps.
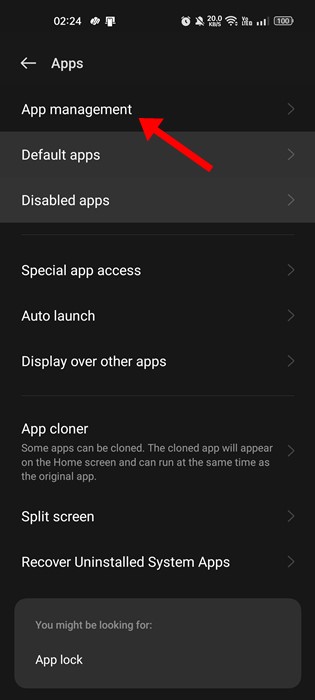
2. On the Apps screen, tap on the App Management.
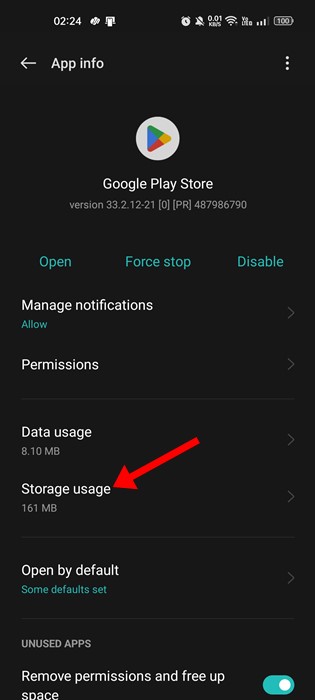
3. Now, find and tap Google Play Store. Next, tap on the Storage usage.
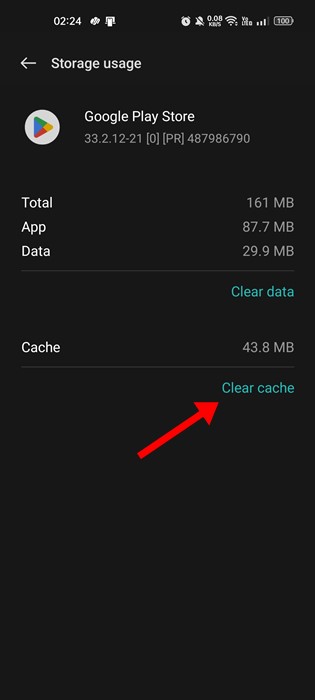
4. On the Storage usage screen, tap on the Clear Cache.
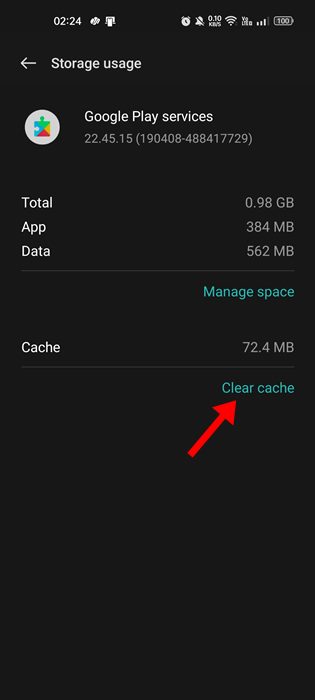
5. You also need to do the same for the Google Play Services app. Tap on the Google Play Services > Storage Usage. On the Storage usage, tap on the Clear Cache.
That’s it! After making the changes, make sure to restart your Android phone.
8. Uninstall and reinstall Google Play Store Updates
Well, we understand Google Play Store might have to do nothing with the Unfortunately Settings has Stopped error, but these methods sometimes fix the error. All you need to do is clear the Cache for Google Play and uninstall the Google Play Store Update.
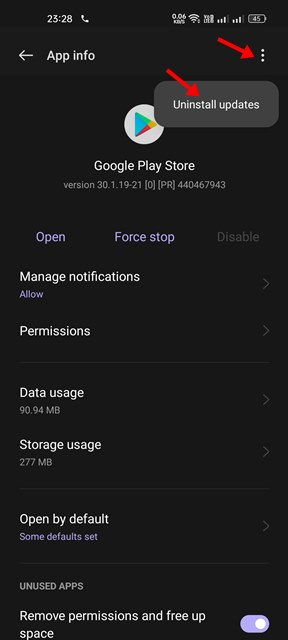
To do that, head to Settings > Apps. Now, under the Apps, find and tap on the ‘Google Play Store’. Clear its cache and uninstall the previous updates. Once done, restart your device, and the Unfortunately Settings has stopped error will be gone.
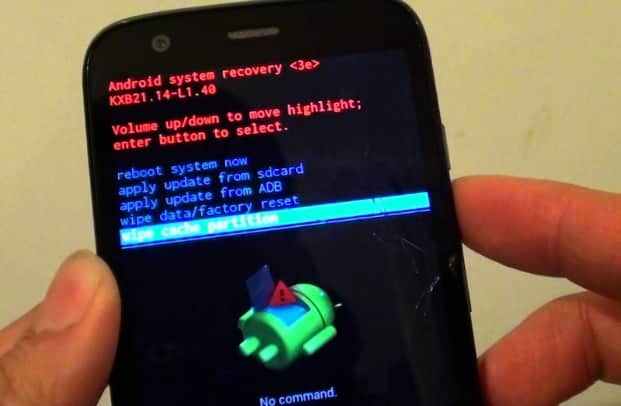
9. Wipe Cache Partition
You will have to enter the Recovery Mode to wipe the Cache Partition. These things will clear all your system cache, including the app’s cache.
However, you must know the key combination to enter the Recovery Mode. You can search for your device’s recovery mode option online.
So, to wipe the cache partition, power off your smartphone and press the key combination to enter Recovery Mode. Now, from the Recovery Menu, use the volume button to navigate to the Wipe Cache Partition Option. Select the Wipe Cache Partition option by using the Power Button.
This article shares every method to fix the Unfortunately Settings has stopped error on your Android Smartphone. Let us know if you need more help resolving this error in the comments.
The post How To Fix ‘Unfortunately Settings Has Stopped’ Error On Android appeared first on TechViral.
ethical hacking,hacking,bangla ethical hacking,bangla hacking tutorial,bangla tutorial,bangla hacking book,ethical hacking bangla,bangla,hacking apps,ethical hacking bangla tutorial,bangla hacking,bangla hacking pdf,bangla hacking video,bangla android hacking,bangla hacking tutorials,bangla fb hacking tutorial,bangla hacking book download,learn ethical hacking,hacking ebook,hacking tools,bangla ethical hacking course, tricks,hacking,ludo king tricks,whatsapp hacking trick 2019 tricks,wifi hacking tricks,hacking tricks: secret google tricks,simple hacking tricks,whatsapp hacking tricks,tips and tricks,wifi tricks,tech tricks,redmi tricks,hacking trick paytm cash,hacking trick helo app,hacking trick of helo app,paytm cash hacking trick,wifi password hacking,paytm cash hacking trick malayalam,hacker tricks, tips and tricks,pubg mobile tips and tricks,tricks,tips,tips and tricks for pubg mobile,100 tips and tricks,pubg tips and tricks,excel tips and tricks,google tips and tricks,kitchen tips and tricks,season 2 tips and tricks,android tips and tricks,fortnite tips and tricks,godnixon tips and tricks,free fire tips and tricks,advanced tips and tricks,whatsapp tips and tricks, facebook tricks,facebook,facebook hidden tricks,facebook tips and tricks,facebook latest tricks,facebook tips,facebook new tricks,facebook messenger tricks,facebook android app tricks,fb tricks,facebook app tricks,facebook tricks and tips,facebook tricks in hindi,tricks,facebook tutorial,new facebook tricks,cool facebook tricks,facebook tricks 2016,facebook tricks 2017,facebook secret tricks,facebook new tricks 2020,blogger blogspot seo tips and tricks,blogger tricks,blogger,blogger seo tips,blogger seo tips and tricks,seo for blogger,blogger seo in hindi,blogger seo best tips for increasing visitors,blogging tips and tricks,blogger blog seo,blogger seo in urdu,adsense approval trick,blogging tips and tricks for beginners,blogging tricks,blogger tutorial,blogger tricks 2016,blogger tricks 2017 bangla,tricks,bangla tutorial,bangla magic,bangla motivational video,bangla tricks,bangla tips,all bangla tips,magic tricks,akash bangla tricks,top 10 bangla tricks,tips and tricks,all bangla trick,bangla computer tricks,computer bangla tricks,bangla magic card tricks,ms word bangla tips and tricks,bangla computer tips,trick,psychology tricks,youtube bangla,magic tricks bangla,si trick Credit techviral

